Friday, March 30, 2012

Taco Salad, Homemade Guacamole and Homemade Tortillas

Last night we had Taco Salad for dinner.  It's a family favorite that I've made over the years.  Nothing really special, but different every time, depending on what I have hanging around here.  Sometimes I have iceberg lettuce, other times I have romaine lettuce and other times I may have bagged salad.  I always have taco meat, usually it's ground beef or ground venison or a combination of both.  Much, much less often I've had ground chicken or ground turkey.  Usually I have fresh tomatoes, although there have been a few times that I haven't and salsa or canned diced tomatoes have filled in.  Usually I have a Mexican blend of cheese, but cheddar works just as well.  When I've planned ahead, I chop some sweet gherkins to top our salads.  I know that sounds really odd, but don't knock it till you try it!  Only one of the bigger kids doesn't like it.  Usually we have some Doritos to either munch on the side or to crumble on top for the crunch that croutons give.  If I don't have Doritos around, I usually have some tortilla chips.  Sometimes we use taco sauce, sour cream, guacamole, red kidney beans.  I haven't had black beans, that I can remember, but now I'm considering adding that into the mix.  Usually we use ranch dressing or Catalina dressing.  Both are put out on the table.  If I don't have Catalina, sometimes I have another  honey french dressing or I'll make a french dressing recipe I found.  I usually keep ranch dressing in the house, because it is a standard favorite for most of the kids.  So, as you can see, the possibilities of variety are almost endless.

Yesterday afternoon I decided to try a recipe for guacamole that I found on Pinterest.  I made a few changes though, based on what I had on hand.

Here's my changes:

Ingredients:

3 Avocados
1 large shallot, chopped (approx. 1/4 c)
2 cloves garlic, minced
1/2 bunch of cilantro leaves, chopped (I actually had this because I bought it for another Indian dish)
1 tomato, diced
Approx 2 tsp of lime juice (I didn't have any fresh limes, but I had lime juice)
Sea salt, to taste
Fresh cracked pepper, to taste


Directions:

Pit avocados and mash in a bowl.

Carefully stir in remaining ingredients until well mixed.

A tip that a friend of mine gave me a couple years ago, is that if you leave at least 1 avocado pit in the guacamole, it helps to prevent oxidation.  It works!  So, that's why you see 2-2 avocado pits in the guacamole.

I really liked how this turned out and will definitely make it again.


I also tried a tortilla recipe that I found on Pinterest, but I don't like it as much as another recipe I've made before.  I need to make my old recipe again to compare.  I don't think any one liked the new recipe.  It called for olive oil instead of lard or shortening.  And the water wasn't hot, which apparently makes a big difference.  The taste of olive oil was overpowering, in my opinion.  So I'm not going to post that recipe.

Here's baby trying the tortilla with some guacamole smeared on it, with our friend getting in on the picture opportunity.  Silly Livy!


A little Mexican blend cheese sprinkled on top.  She likes grated cheese.


Enjoyed her bit of taco meat and seemed to be happy after dinner.


My dinner plate.  Missing a few things, but we had to eat and run, so I didn't have time to chop gherkins.  But, most importantly, I had the guacamole in there and it was good!


Homemade Spagetti-O's, Sort Of

I saw this recipe on Pinterest a few weeks ago and pinned it on one of my boards.  The original poster of this recipe is here.  When it came time to think about what to do for lunch yesterday, I decided to see if I had everything to make it.  I had most of the ingredients and had to substitute some of the others.


Ingredients

6 cups canned tomato sauce
3-4 cups water
2-3 teaspoons of garlic powder (depending on how garlicky you like it)
1 lb pasta, preferably smaller shapes
1 - 1 1/2 cups shredded cheddar cheese (or Mexican blend works just as well)
1/4-1/2 cup of milk
2 Tablespoons of butter
Salt to taste (I didn't add so that baby could eat)


Directions

1. Combine tomato sauce, water and garlic powder in a large pot.  Bring to a boil.
2.  When the tomato mixture is boiling, add the pasta to the pot.  Cook, stirring frequently (the pasta is tiny, so it's easy to stick to the bottom) for about 20 minutes, or until the pasta is soft.
3.  Stir in cheese until melted.  Add milk, butter and salt to taste.  Taste it, check it out, see how you like the flavors.  Then enjoy it!


 I had penne rigate, so I used that.  I didn't have cheddar cheese, but I had a Mexican cheese blend.  It turned out well enough, that my three children who liked the commercially made Spaghetti-O's said to not buy them again, because this was soooo much better!  The only big change I'd make next time is to stay really close to the pot and not let the boiling get rapid but rather slower because the pasta really absorbs the liquid.  I will probably use farfalle or bow tie pasta next time since it is a big shape for baby to pick up.  She really liked it and had two bowls.

Eating her first bowl.

Waiting for a second bowl.  She fussed when I walked away with her bowl.  Ha ha!


I had to take her amber teething necklace off and clean it, because she was getting the sauce all over it.  She really enjoyed her homemade spaghetti-O's!


And as soon as lunch was done, she got a bath!

Wednesday, March 28, 2012

Indian Cuisine at Home

We love Indian food.  I'm sure I've mentioned that in a previous post.   But, since tree nuts are in many Indian dishes and one of the younger ones has a life threatening allergy to tree nuts, I've been trying to make our own at home.  All of us love curry.  All but one of us likes Butter Chicken.  And that's what I made last night for dinner, along with Naan bread and basmati rice.  I use a recipe that I found on Food Network for the Butter Chicken and adapt it to my own preferences.  That recipe calls for using a rotisserie chicken, which I don't use due to the nut allergy.  Instead, I usually bake up some skinless, boneless chicken breasts.  However, this time I had bought some skin-on and bone-in chicken thighs on sale.  I'll admit, the skinless, boneless chicken breasts is much, much less time consuming, as well as my preference now.  Timing of these dishes is of essence, to be able to sit down and eat them together, so I'll share with you what I learned from last night's experience.

Naan bread needs to be started at least an hour to an hour and a half before starting the Butter Chicken dish and basmati rice, if you are using the rotisserie chicken.  If you are baking your own chicken you will want to do that in advance, so that it has time to cool for cutting or shredding. 

I needed to bake my chicken first.  I actually felt that the chicken I had equaled two rotisserie chickens, so I doubled everything for the Butter Chicken recipe (the recipe that follows is not doubled) last night.  I baked the chicken thighs at 350 degrees for about 40 minutes.  Then I let them cool so that I could handle them.


While the chicken cooled, I started working on the Naan.  The yeast needs to be at room temperature, so if you buy it in bulk, like I do, you need to pull it out of the fridge in advance.  I used a recipe I found on Pinterest for the Naan and followed it exactly, except that I used vanilla yogurt.

I have used plain yogurt as well as vanilla yogurt and both have worked well.

The original recipe is from Andrea's Recipes..
Here's what the dough looked like before rising.


Then I started working on the basmati rice.  I have a rice cooker that we got a few months ago.  I absolutely love my rice cooker!  Basmati rice needs to be rinsed first.  Until last night I used to put the rice into a bowl of water and then poor it into a strainer to drain and then repeat the process one or two more times.  I had seen Aarti Sequeira of Food Network use the strainer in a bowl of water and then pull it out of the bowl of water to drain.  Well, that sure is an easier process, especially when you have to rinse it two or three times! 

Here's three cups of bastmati rice before soaking in the bowl of water.


The rinsing helps to get rid of some of the starch.  Here's the beginning of the first rinse.


You need to rinse till the water is clearer, which really can take two or three times.  The water looks milky like this:


Rinsed and in the rice cooker with the appropriate amount of water.


Now onto the Butter Chicken!  I use this recipe that I got from Food Network, but adapt it for my family.

My adaptation:

I use the spice blend exactly as it is in the recipe I linked to.

For the sauce, I changed:
  • 6 tablespoons butter
  • 2 teaspoons jarred minced garlic
  • 3 lbs. baked/cooked chicken (breast, thigh or whole chicken with the meat pulled off the bone)
I don't use peas.  Everything else stays the same.

*Remember I doubled the recipe to fit my needs last night, so the pictures are the doubled amounts.  These measurements written here are not doubled. 

The spices before blending (Please excuse the absent minded sprinkling of garlic powder mixed in there, which was mistaken for ginger while I was distracted by a question asked of me):


To make the sauce, I use my Rachael Ray oval cast iron pot with ceramic coating, and yes it is orange. The spices smell!  I hear lots of "ohhhh that smells good" at this point!.


 I recommend breaking your chicken down into the pieces before starting this your first time and then gauge your timing for the next time you try this.


Now, back to the Naan bread while that simmers away.  Here's what it looks after rising for one hour.


Divide the dough into eight pieces:


Then shape into teardrop-like shapes:


I didn't take pictures of the Naan on my pizza stone in the oven, because...well, the heat needs to stay constant and it's a challenge to take a picture while you are putting dough on a hot stone in a hot oven with a baby crawling/walking around.  Here's what they look like after baking.  The shiny ones have the garlic butter and the other one has not been buttered yet.  We've now had it both ways and both ways are very good.


Now at some point during the shaping and baking of the Naan, the Butter Chicken is ready for the heavy cream.  The original recipe I have adapted from calls for peas.  I don't use peas.  Why?  Because the Indian restaurant that I had first tried this dish at didn't have peas in theirs.  So I don't either.  The rice should be ready by now too.  If you have a rice cooker, it should keep the rice warm if it's already done.  If not, then you have a couple more steps to do manually.  Here's the Butter Chicken after adding the heavy cream.


Here's the rice from my rice cooker all ready for plating:


My plate:


Of course, you could serve another vegetable with this, but I didn't.  It's got a some tomato, so I had a little vegetable in there - antioxidants right?

And what does baby think about all of this?


She kept blinking when I took her picture.  Somehow I missed getting a picture of her eating the Naan last night, but I did get a picture of her eating it the first time I made it.


We had enough left over to eat for lunch today.  I did make Naan fresh for lunch.  Just as good the second time around.
I hope this inspires you to give it a try.

Monday, March 26, 2012

Reading The Hunger Games

You would have to live under a rock if you haven't heard about The Hunger Games yet.  It's the most recent book/movie rage now.  My oldest has read the trilogy and many of her friends have, as well as a few of my friends.  I started reading the first book but had to stop to take care of some real life stuff.  But now I am trying to finish reading.  I've kept my time on Facebook very limited because so many of my friends have seen the movie now.  We've had to wait a bit because we had a scheduling conflict due to responsibilities the kids have in 4-H.  Plus I'm taking a few of oldest's friends with us and some of them had the same responsibilities.

Some of her friends keep telling me to keep reading!  To which, I respond "I want to, but I don't have as much free time as you all do!" And then they laugh.  Hee hee hee.  I read some more last night and need to give a bit of time each day.  Thing is, I know that I will have a hard time putting the book or kindle down once I get going.  And that's the reason I've taken so long since I started.  I'm at the point in the first book where I think the action is going to start in the next chapter.  I'll try to post a review without spoilers when I finish.

Sunday, March 25, 2012

My Own Friday Night Knitting Club - Sort of

I know this will make two posts in one day, but I was still on my "knitter's high" from finishing the wool dryer balls yesterday and wanted to get the yarn for MY wool dryer balls.  So this afternoon I made a quick run to my local yarn store.  Note that I said yarn store, not craft store (like JoAnn's or Michael's or A.C. Moore).  I had already been to the craft store last week and wanted to see more selection of wool yarn. 

I drool every time I go to this store.  The colors and textures are just so beautiful and inspiring.  I always look around to see what's different since my last visit.  The owners/employees always seem so nice when I go in.  Today when I walked in, I looked around for about a minute or two before the lady asked if she could help me find something.  I asked her if she had anything on clearance.  She pointed out to me what she had for 40% off.  I went to look.  Beautiful colors and beautiful yarn.  Wools, organic cotton, merino wool, earth colors, beautiful deep rich colors, jewel colors and pastel colors.  I picked out two skeins each of two colors.  Then I decided to look around a bit. 

I saw sock yarn.  Hmmmmm.  No.  I need to pass for now, because I already have sock yarn and socks to knit.  Come back for sure when they are done.  I saw hand beaded yarn.  Drool.  Then I saw 100% Peruvian Wool in a georgous rainbow of colors.  Heavier weight than what I had in my hands, which should take less time winding.  And it would end up costing about the same, if not a little bit less.  I decided to take it to the register and find out which would be better.  She had felted with the Peruvian Wool before and she said it worked well for felting.

What made it feel like The Friday Night Knitting Club to me??? (If you are a reader/knitter and you haven't read it yet, you should. There were two classes going on.  I don't remember seeing that on my other visits.  I knew they had these classes, just not going on when I've been there.  And just being there in the store in this environment makes me think of my dear knitting friends (stateside and overseas) and the friends who just enjoy hanging out with us as we knit.

So I told her about my project and she had never heard about it.  One of the other ladies there was curious as well.  As I made my purchase and prepared to leave, she asked me to bring them in when I finish them.  Come to think of it, I think she said the same thing when I bought my yarn for my Booga Bags too.  Guess I should take in the Booga Bags and the wool dryer balls soon.
Here's the yarn I came home with.  I love these colors and look forward to the finished project.  Believe me when I say, the picture just doesn't do justice for the yarn.  It's prettier in person.

Make Your Own Wool Dryer Balls

I had seen WAHMs selling wool dryer balls and had even seen some offered at a discount on one of my favorite websites.  But I got to wondering if I could make my own.  So I did a web search.  Was I happy to see that many had made their own? Yes, I was!!
You can find the directions that  I used here.  I made some this week and gave them as a baby shower gift yesterday.  I love the way they turned out and I'm anxious to make some for myself now!

Here's what I did:


I used roving wool in the pink and green colors and the cream was fisherman's wool yarn.


Here's my cores before putting them into the stockings.


Here's my cores ready for the first felting.


After the first felting and the first wool ball rolled ready for the second felting.


All the wool balls rolled and ready for the second felting.


All done!


So why do this?  Because it is a natural product that isn't laden with chemicals.  I've been using those plastic nubby balls, but they only last for so long and I didn't even think about the PVC in them.  I just knew that it wasn't softener, which you aren't suppose to use on baby clothing.  Plus, I'm trying to be "green" where ever I can within my logical capabilities.  My understanding is that these wool balls are suppose to last a very long time.

Over all, it is not too long of a process.  The roving yarn seems to take a little less time to roll.  They did make a lot of noise in the dryer, but they were tied together in the stocking, so they weren't tumbling independently.  I don't think they'll make as much noise when they aren't tied together.  I think I have enough yarn left for me to make cores for myself.  I need to get more yarn to complete my own wool balls though. 


Tuesday, March 20, 2012

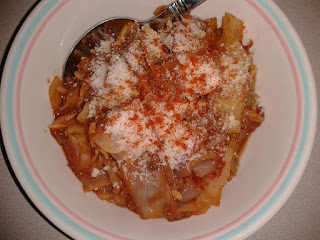
Stuffed Cabbage Stoup


I don't know about you, but I like a lot of Rachael Ray's recipes.  One I've done many times is her Stuffed Pepper Stoup.  After I had made it a few times, I realized I could probably change it up a bit and turn stuffed cabbage into Stuffed Cabbage Stoup.  It was a hit in my house for all but one child.  That makes it a keeper.  I've made it just as many times now too.  Here's what I do.  The haze in the pictures is the steam rising from the pot.


Ingredients:

2 T extra virgin olive oil (EVOO)
1 1/2 lbs. ground meat - chicken, turkey or beef (I had ground venison on hand)
Salt and black pepper
1/2 - 1 palm full of paprika (now that I think of it, smoked paprika would probably be good)
4 cloves garlic, chopped (or pre-chopped garlic)
1 large onion (I had Vidalia), cut into bite-size dice.
1/2 head of cabbage, cored and cut into bite-size pieces
1 bay leaf
1 quart chicken stock
1 can crushed tomatoes (28 ounces)
1 cup orzo pasta
more paprika to taste
Grated Parmigiana Reggiano or your choice of grated cheese to top the servings.

Generously serves 4 (Serves my whole family of 8 with some leftovers)

Heat a medium soup pot over medium-high heat with the EVOO.  When the EVOO is hot, add ground meat and season with salt, black pepper and paprika.  Brown the meat for 5 minutes then add onion, cabbage, garlic and bay leaf and cook for 7 - 8 minutes, until tender.


Stir in stock and tomatoes and bring to a boil.  Add pasta and cook for 7 - 8 minutes.  Turn off heat and add more paprika, if desired.  Serve with grated cheese.


This is yet another meal that baby likes.  Because there is salt in the chicken stock, I don't add any extra right now so that baby can eat it with us.


And that is stuffed cabbage without all the work of making the filling, stuffing the cabbage leaves and rolling.  I get the taste of stuffed cabbage much quicker!

Monday, March 19, 2012

Bruschetta Italian Chicken

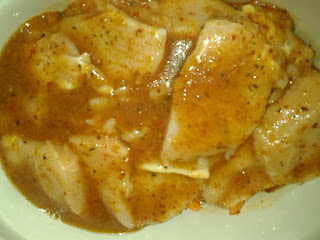
Have you ever had Italian Chicken before?  We had had it years ago.  I bought Bruchetta Italian dressing on sale and with a coupon a few weeks ago.  My most recent shopping trip included chicken breast, carrots , potatoesn onions and green squash.  So we tried a variation on the old standby.


The ingredients:


Wash and chop the veggies and add to the crockpot.


Add desired amount of baby carrots.  I added about 3/4 of the bag.


Add the chicken and full bottle of dressing.  You can add salt and pepper at this point if you haven't already.  I didn't add salt or pepper because there was enough sodium in the dressing and baby was going to share this with us.


Cook on low for 6 - 8 hours or on high for 4 - 5 hours.


I have to admit that I love a one-pot meal, especially on a busy night.  Baby enjoyed dinner too.  We didn't find much of her food in her highchair or on the floor, in fact, she ate ALL of her carrots!