Showing posts with label cooking. Show all posts

Wednesday, April 18, 2012

Southwest Hamburgers

I went to the fridge yesterday to see what I had available for dinner.  I had some ground beef that needed to be used soon and avocados that were ripe and needed to be used.   I also had tomatoes that needed to be used and some red onion.  I had a container of bread crumbs nearing expiration.  I had half a bunch of cilantro and bacon leftover from the 3/4 lb that I used to wrap the chicken legs.  The makings for Southwest Hamburgers! I made the guacamole recipe I had found on Pinterest, putting the 3 avocado pits back in to prevent oxidization, wrapped tightly with plastic wrap pressed to touching the surface and put it in the fridge.  When it came time to make dinner, here's what I did.

Southwest Hamburgers

Ingredients

2 lbs ground beef
2 eggs
1-2 Tablespoons of yellow mustard
2 - 4 Tablespoons of ketchup
Approx. 3/4 cups of breadcrumbs (I had Italian flavored and it was just fine)
Approx. 1/4 lb bacon
Guacamole
Sour cream
Extra ketchup and mustard for topping, if desired

Directions

Mix beef, eggs, yellow mustard, ketchup, and breadcrumbs gently, until well mixed without over mixing.  Shape into patties and make an indentation in the center.  Place in hot oiled or buttered pan and fry for approximately 8 minutes on each side.  While burgers are cooking, fry bacon in another pan.  Serve on your favorite buns and top with guacamole, sour cream, bacon and ketchup or mustard, if desired.

I threw some sweet potatoes fries in the oven while all this was cooking.


My 12-year-old son got a look at this as I was taking the picture and exclaimed, "oh my gosh!  That looks awesome!"  And then he proceeded to make one just like this for himself.  As he ate it he was gushing over it and he is already asking for it to be part of his birthday meal choices!  He said, "move over jambalaya!  Meet Mom's hamburgers!"  Funny boy!

Monday, April 16, 2012

Ham Soup

I have my friend Bev to thank for this inspiration.  When we visited her and her family about a year and a half ago, she made a ham soup and Steve and I absolutely loved it.  So I've made ham soup a couple times since, each time turning out different, depending on what I had on hand.  I had leftover ham from Easter, so I wanted to make a soup and some quiche.

I put the ham bone, with some ham still on it, in a big pot of water.  Brought it to a boil and then covered it and let it simmer for at least an hour and a half, a bit more if desired, till the ham is falling off the bone.  I then ended up cooling and putting it in the fridge, because I had started too late that afternoon to finish for dinner.  So I pulled it all out today to make the soup.  The fat had settled on the top, so I left some of it in the container, but used some too.  The gelatinous stuff left after baking the ham adds tremendous flavor to the broth.


INGREDIENTS:

Ham broth
Leftover ham, cubed
1/4 c butter
2 cloves garlic, chopped
1 medium onion, sliced
2 stalks of celery, chopped (I like to peel the stringy side to make it easier to eat)
2 handfuls of baby carrots sliced
5-6 baby red potatoes, cubed
8 oz. pasta of your choice
1 - 15 oz. can butter beans
Approx. 4 cups of water


To make the soup, before heating the broth, I chopped up the garlic, onion, celery and carrots while the butter melted in the pot.


 Then I added all the veggies except the baby red potatoes to the melted butter and let them sweat or soften up a bit. Before the veggies caramelized, I added the ham broth and the water. 


 Then I brought the broth to a boil and added the baby red potatoes.  After letting the potatoes cook for about 5 minutes, I added about 8 oz. of pasta (3/4 of a 12 oz. box).


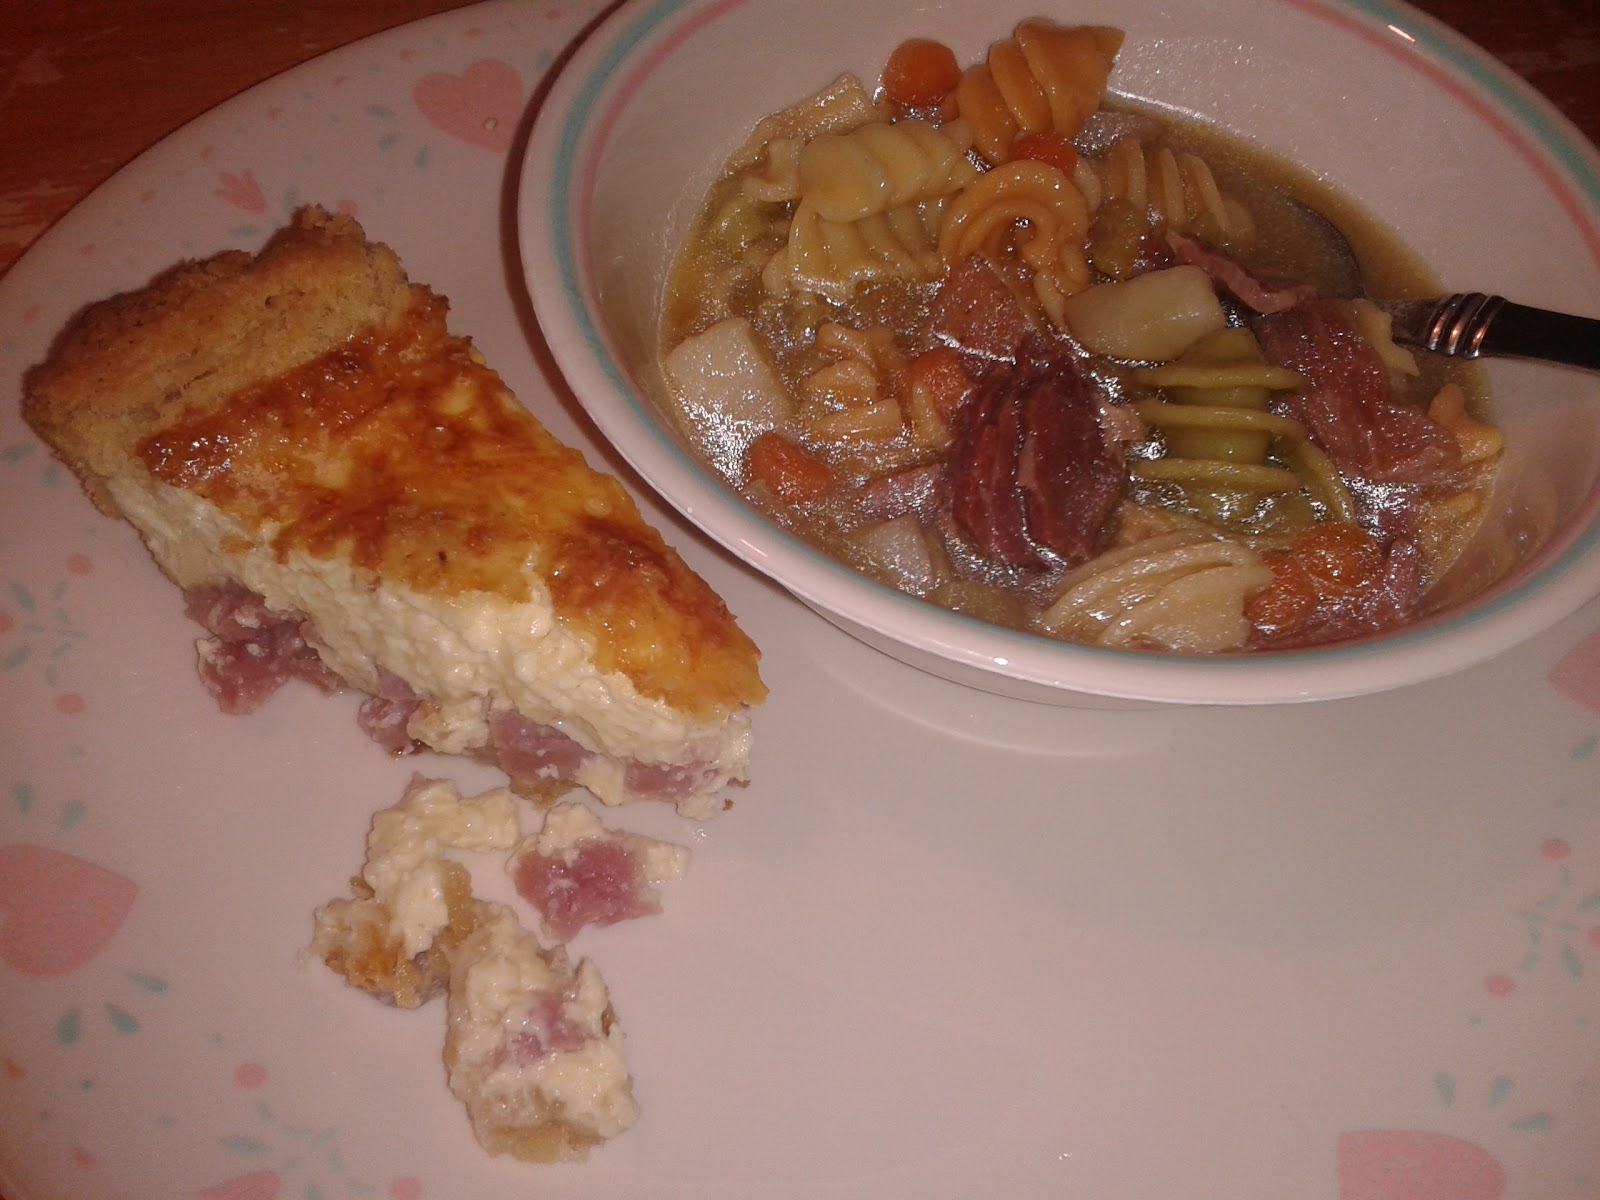
I also made 2 ham quiches.  I'd love to share the recipes with you for the crust and the quiche, but they are from 2 of my cookbooks and I am learning about copyrights.  I tweaked the quiche recipe to fit what I was doing, but I always go back to this recipe when I forget the measurements.  If I can get permission to share these recipes, I will in the future.  This pie crust is one of my favorites.  It's from The Beverly Lewis Amish Heritage Cookbook.  It goes well with quiche, Shoo fly Pie, Blueberry Custard Pie...well, you get the idea, it's a very good recipe!  I'm going to ask my friend who shared the Blueberry Custard Pie recipe with me if I can share it with you.  I haven't mastered the art of rolling out a perfectly round pie crust yet.  And, I like the rustic look.  It's not that I don't like the perfectly pinched crust, it's just that I like the crust so much, that I don't want to take the extra off to make it look perfect and then hope that I end up with a piece with the extra crust.  Are you smiling with me about that?  I love a good pie crust.  Here the quiches are ready to go in the oven.


Fresh from the oven, ham quiche goodness!  Can you smell that?  Oh, I'm sorry!  I bet you wish you could!


And voila!  Ham soup and ham quiche.  Yum!


Wednesday, April 4, 2012

Baby's 1st Birthday and Her Cake is...Oreo Pudding Poke Cake!

We recently celebrated baby's 1st birthday.  She hasn't really been a fussy eater, so I was challenged in deciding what to make for her meals.  See, we have a tradition around here of the birthday person choosing the meals for their birthday.  So I needed help from the family in deciding what we were going to eat for baby's birthday. 

We settled on cinnamon sugar blintzes for breakfast, which she hadn't had yet.  We love blintzes!  They are rather simple, but they take time to cook enough for each person.  So it ends up taking me, or the person who jumps in and helps me, usually Steve, about an hour to cook and serve everyone.  For that reason alone, we only do them on occasion.  She seemed to enjoy her blintz.


Then for lunch we treated ourselves to some Papa John's pizza, which the kids tell me is second to my homemade pizza.

For dinner, we had panko breaded tilapia (which sometimes is nice to have on hand from our local warehouse store)and sauteed veggies.  I have sauteed frozen green beans many times and change it up each time.  This time around, I had bought some red peppers that were a manager's sale for $.99/lb.  I also had bought some green squash after lunch on my weekly grocery trip.  So, Steve suggested adding both of them to the green beans this time.  Such a good idea!  No real recipe, just more or less throwing good things together to make them even better.  But, I realize that a recipe format might be easier.  So here it is:

Ingredients:

1/2 c unsalted butter
Approx 3 Tablespoons of extra virgin olive oil
2 green squash, halved and sliced lengthwise
3 red peppers, sliced lengthwise
1 onion. sliced
2 - 3 generous handfuls of frozen petite green beans (I get these in bulk from our warehouse store)
2 - 3 cloves of garlic chopped (or a couple teaspoons of pre-chopped garlic)
Fresh ground sea salt, to taste
Fresh ground pepper, to taste

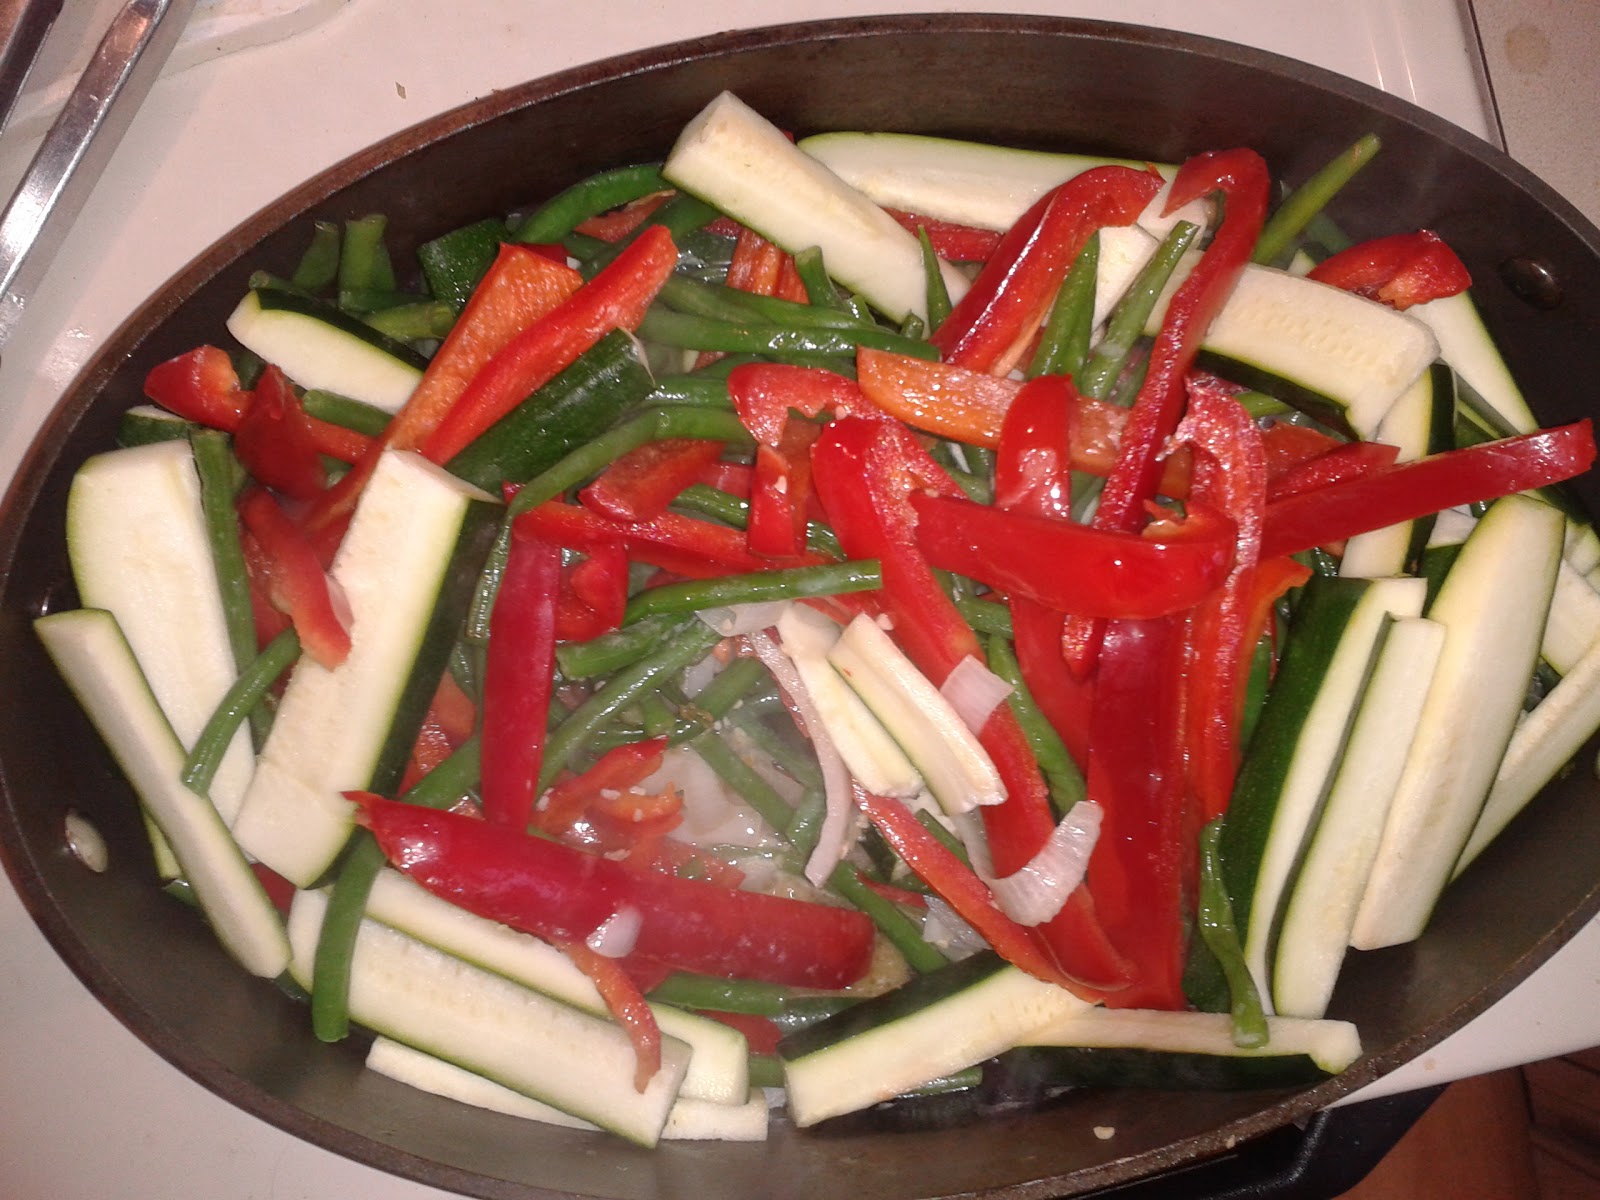
Here I had sliced lengthwise the green squash, red bell peppers and onion.


Melt the butter and add the extra virgin olive oil.  Saute the onions and garlic for about 2 minutes.  Add the rest of the veggies.


And saute until tender.  Doesn't that look good?  If you like your squash firmer, just add it a little later.


She sure thought her dinner was good!  See that cupcake on her shirt?  Totally unplanned!  Steve dressed her in that outfit in the morning.  Good job, right?


Now, her birthday cake!  I got this inspiration from Pinterest.  The link that had been pinned lead me to Chef-in-training, but she got it from The Country Cook.


Ingredients:
1 Box Chocolate Cake Mix
Ingredients needed to make cake (usually eggs, oil and water)
2 (4 oz.)packages of Instant Oreo pudding
4 cups milk (2% or higher)
Crushed Oreo Cookies (optional)

Directions
Make cake mix according to directions and bake in a well-greased 9x13 pan (I use the nonstick spray that has flour in it).
Just before cake is done, start making pudding. In a medium bowl, add milk to pudding mixture and continue to whisk until most of the lumps are removed. Let pudding mixture sit for about 2 minutes. You want it to thicken slightly so it isn't overly runny but not fully thickened into pudding.
Pour pudding mixture over warm cake.
When cake is finished, while still warm, poke holes all over cake (about 1-inch) intervals using a wooden spoon handle or a straw.  (I didn't get any pictures of thus, but Brandie, aka, The Country Cook did)
Spread it out with a spoon and gently push down on the pudding to help get it into the holes.
Allow the cake to cool for several minutes on the counter then put into the fridge to set up. About an hour.
Once it is set, top with crushed Oreo cookies


Cook’s Note: This is great with so many different combinations; yellow or white cake mix with chocolate pudding is a good one. The Oreo pudding combination is our favorite.
Enjoy!

Steve helped make and bake the cake while I was checking out at the grocery store and making my way home with birthday balloons and groceries.  We used a dark chocolate cake mix.  I wanted her first taste of chocolate to be a good one, as well as memorable.  Here's what the cake looked like after poking the holes with the wooden spoon handle and pouring the Oreo pudding over top.


Since it's Oreo's 100th birthday, and I had found these on sale a week or two ago, we used them.  How appropriate!


My 12-year-old son crushed the Oreo's in a Ziploc bag with one of my pans.


My 10-year-old daughter sprinkled the crushed Oreo's over the cake.


My 7-year-old daughter was my helper at the store.  My little dilemma in deciding to make a cake that doesn't leave room for writing on the top was, how to identify that this is a 1st Birthday Cake.  We had decided to get these letter candles that I had seen on a previous grocery trip, and she had suggested that we get the 1 too.  Smart girl!  Warning though, the letter candles are basically a one time use candle set.  The letters end up melting away too quick to use again.  No biggie.


Apparently the B candle looked yummy!


Finger in the cake!


Her first official taste of chocolate!


Oh yea baby!  That was good!


Well, would this make you happy?


She seemed to think it was good enough to lick the plate!


Definitely a happy birthday cake for her!  To be honest, I think a couple of us had a second helping.  Believe me, it will be worth your time to try and make this cake.  Thank you for sharing the recipe Brandie!

Friday, March 30, 2012

Homemade Spagetti-O's, Sort Of

I saw this recipe on Pinterest a few weeks ago and pinned it on one of my boards.  The original poster of this recipe is here.  When it came time to think about what to do for lunch yesterday, I decided to see if I had everything to make it.  I had most of the ingredients and had to substitute some of the others.


Ingredients

6 cups canned tomato sauce
3-4 cups water
2-3 teaspoons of garlic powder (depending on how garlicky you like it)
1 lb pasta, preferably smaller shapes
1 - 1 1/2 cups shredded cheddar cheese (or Mexican blend works just as well)
1/4-1/2 cup of milk
2 Tablespoons of butter
Salt to taste (I didn't add so that baby could eat)


Directions

1. Combine tomato sauce, water and garlic powder in a large pot.  Bring to a boil.
2.  When the tomato mixture is boiling, add the pasta to the pot.  Cook, stirring frequently (the pasta is tiny, so it's easy to stick to the bottom) for about 20 minutes, or until the pasta is soft.
3.  Stir in cheese until melted.  Add milk, butter and salt to taste.  Taste it, check it out, see how you like the flavors.  Then enjoy it!


 I had penne rigate, so I used that.  I didn't have cheddar cheese, but I had a Mexican cheese blend.  It turned out well enough, that my three children who liked the commercially made Spaghetti-O's said to not buy them again, because this was soooo much better!  The only big change I'd make next time is to stay really close to the pot and not let the boiling get rapid but rather slower because the pasta really absorbs the liquid.  I will probably use farfalle or bow tie pasta next time since it is a big shape for baby to pick up.  She really liked it and had two bowls.

Eating her first bowl.

Waiting for a second bowl.  She fussed when I walked away with her bowl.  Ha ha!


I had to take her amber teething necklace off and clean it, because she was getting the sauce all over it.  She really enjoyed her homemade spaghetti-O's!


And as soon as lunch was done, she got a bath!

Wednesday, March 28, 2012

Indian Cuisine at Home

We love Indian food.  I'm sure I've mentioned that in a previous post.   But, since tree nuts are in many Indian dishes and one of the younger ones has a life threatening allergy to tree nuts, I've been trying to make our own at home.  All of us love curry.  All but one of us likes Butter Chicken.  And that's what I made last night for dinner, along with Naan bread and basmati rice.  I use a recipe that I found on Food Network for the Butter Chicken and adapt it to my own preferences.  That recipe calls for using a rotisserie chicken, which I don't use due to the nut allergy.  Instead, I usually bake up some skinless, boneless chicken breasts.  However, this time I had bought some skin-on and bone-in chicken thighs on sale.  I'll admit, the skinless, boneless chicken breasts is much, much less time consuming, as well as my preference now.  Timing of these dishes is of essence, to be able to sit down and eat them together, so I'll share with you what I learned from last night's experience.

Naan bread needs to be started at least an hour to an hour and a half before starting the Butter Chicken dish and basmati rice, if you are using the rotisserie chicken.  If you are baking your own chicken you will want to do that in advance, so that it has time to cool for cutting or shredding. 

I needed to bake my chicken first.  I actually felt that the chicken I had equaled two rotisserie chickens, so I doubled everything for the Butter Chicken recipe (the recipe that follows is not doubled) last night.  I baked the chicken thighs at 350 degrees for about 40 minutes.  Then I let them cool so that I could handle them.


While the chicken cooled, I started working on the Naan.  The yeast needs to be at room temperature, so if you buy it in bulk, like I do, you need to pull it out of the fridge in advance.  I used a recipe I found on Pinterest for the Naan and followed it exactly, except that I used vanilla yogurt.

I have used plain yogurt as well as vanilla yogurt and both have worked well.

The original recipe is from Andrea's Recipes..
Here's what the dough looked like before rising.


Then I started working on the basmati rice.  I have a rice cooker that we got a few months ago.  I absolutely love my rice cooker!  Basmati rice needs to be rinsed first.  Until last night I used to put the rice into a bowl of water and then poor it into a strainer to drain and then repeat the process one or two more times.  I had seen Aarti Sequeira of Food Network use the strainer in a bowl of water and then pull it out of the bowl of water to drain.  Well, that sure is an easier process, especially when you have to rinse it two or three times! 

Here's three cups of bastmati rice before soaking in the bowl of water.


The rinsing helps to get rid of some of the starch.  Here's the beginning of the first rinse.


You need to rinse till the water is clearer, which really can take two or three times.  The water looks milky like this:


Rinsed and in the rice cooker with the appropriate amount of water.


Now onto the Butter Chicken!  I use this recipe that I got from Food Network, but adapt it for my family.

My adaptation:

I use the spice blend exactly as it is in the recipe I linked to.

For the sauce, I changed:
  • 6 tablespoons butter
  • 2 teaspoons jarred minced garlic
  • 3 lbs. baked/cooked chicken (breast, thigh or whole chicken with the meat pulled off the bone)
I don't use peas.  Everything else stays the same.

*Remember I doubled the recipe to fit my needs last night, so the pictures are the doubled amounts.  These measurements written here are not doubled. 

The spices before blending (Please excuse the absent minded sprinkling of garlic powder mixed in there, which was mistaken for ginger while I was distracted by a question asked of me):


To make the sauce, I use my Rachael Ray oval cast iron pot with ceramic coating, and yes it is orange. The spices smell!  I hear lots of "ohhhh that smells good" at this point!.


 I recommend breaking your chicken down into the pieces before starting this your first time and then gauge your timing for the next time you try this.


Now, back to the Naan bread while that simmers away.  Here's what it looks after rising for one hour.


Divide the dough into eight pieces:


Then shape into teardrop-like shapes:


I didn't take pictures of the Naan on my pizza stone in the oven, because...well, the heat needs to stay constant and it's a challenge to take a picture while you are putting dough on a hot stone in a hot oven with a baby crawling/walking around.  Here's what they look like after baking.  The shiny ones have the garlic butter and the other one has not been buttered yet.  We've now had it both ways and both ways are very good.


Now at some point during the shaping and baking of the Naan, the Butter Chicken is ready for the heavy cream.  The original recipe I have adapted from calls for peas.  I don't use peas.  Why?  Because the Indian restaurant that I had first tried this dish at didn't have peas in theirs.  So I don't either.  The rice should be ready by now too.  If you have a rice cooker, it should keep the rice warm if it's already done.  If not, then you have a couple more steps to do manually.  Here's the Butter Chicken after adding the heavy cream.


Here's the rice from my rice cooker all ready for plating:


My plate:


Of course, you could serve another vegetable with this, but I didn't.  It's got a some tomato, so I had a little vegetable in there - antioxidants right?

And what does baby think about all of this?


She kept blinking when I took her picture.  Somehow I missed getting a picture of her eating the Naan last night, but I did get a picture of her eating it the first time I made it.


We had enough left over to eat for lunch today.  I did make Naan fresh for lunch.  Just as good the second time around.
I hope this inspires you to give it a try.